
Website visitors want fast answers. Most of them won't wait around in a browser tab for a reply. The chat to text widget gives them a better option: start a conversation on your site, finish it by text.
Step 1: Create a New Widget
From the Beetexting main interface, go to Tools > Chat Widgets. This is where every widget you've built or started lives. Click Create Chat Widget to begin.
Give the widget an internal name. Visitors won't see this, it's just for your team to keep widgets organized. Then enter the web domain where the widget will live.
Step 2: Design the Widget
Next, shape how the widget shows up on your site:
- Choose a standard icon or upload your own
- Write the welcome message visitors see when the widget is collapsed
- Set the avatar icon
- Pick where the widget sits on the page
Step 3: Connect Your Phone Numbers
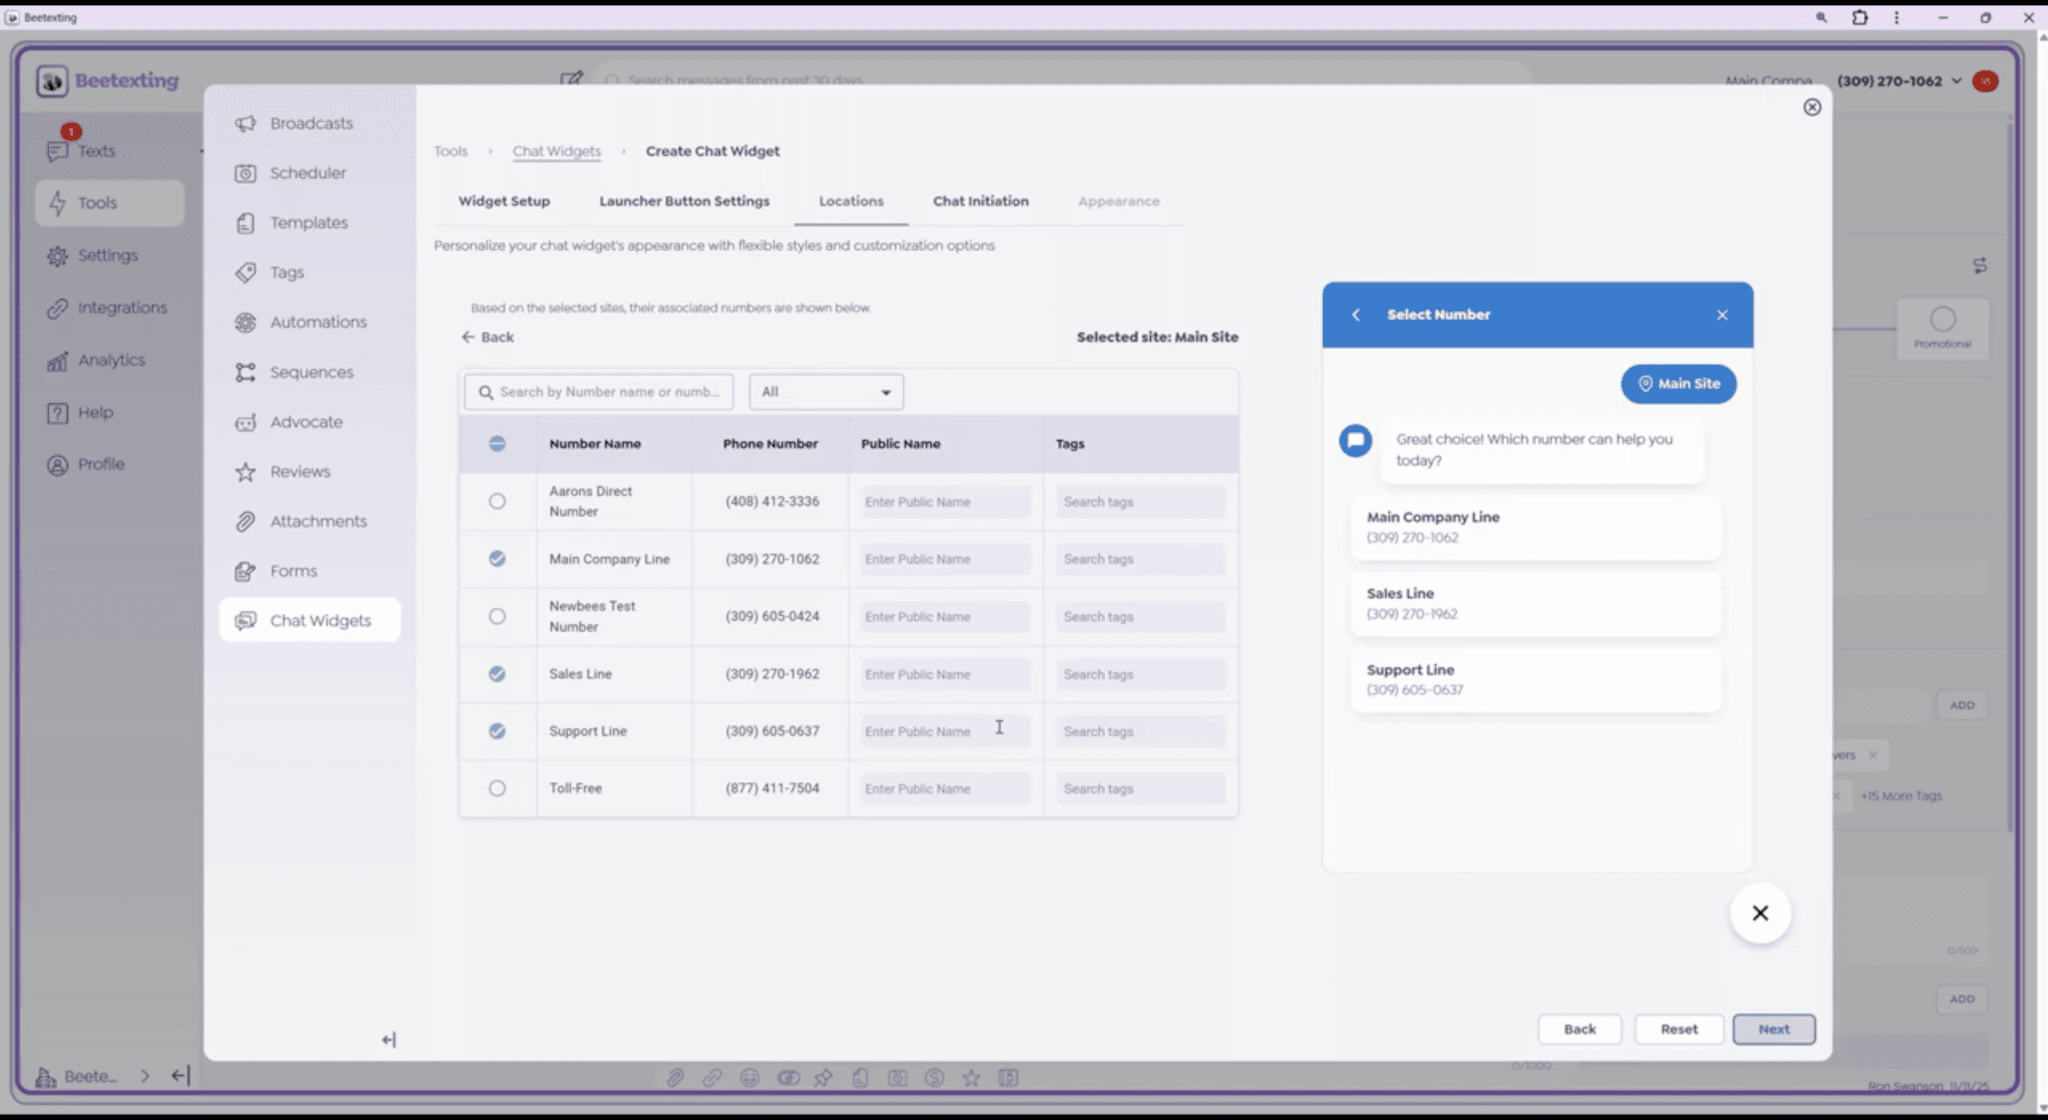
Decide which Beetexting phone numbers to offer as options. Edit the header language under the chat title field first, then choose your numbers.
If your organization uses multi-site, select the sites to include, then pick the numbers under each one. You can give each number a public-facing name and add a tag that applies automatically to any contact who fills out the form.
Step 4: Set Up Chat Initiation
The chat initiation tab controls what happens after a visitor picks a number. Here you'll write:
- The introduction message
- The thank you message shown after the form is submitted
- The confirmation button text
- Optional fields on the contact form
Mobile number, message, and terms and conditions are always required. You'll also set the opt-in message next to the consent checkbox, along with the terms and conditions title and URL.
Step 5: Style It
Under the appearance tab, pick from a few pre-built themes, or click the palette icon to customize colors for each part of the widget.
Step 6: Publish and Embed
Click Publish, then head back to the chat widget menu and select Copy Code Snippet.
To add it to your site, log into your website editor. For WordPress, go to Appearance > Theme File Editor, select the footer file, and scroll to just above the closing body tag. Paste the snippet there and click Update File.
What Visitors Experience
Once the widget is live, a visitor can open the chat, choose the number they want to reach, enter their contact info, and type their message. After they check the consent box and hit submit, Beetexting creates a new contact and their consent automatically, and drops their message straight into a text thread, ready for your team to respond.
Why It Matters
The chat to text widget helps you grow your opted-in contact list while giving visitors the fast, convenient channel they already prefer. No app to download, no hold music, just a text conversation started right from your website.